AI Assistants
Create dedicated assistants, configure skills and prompts
AI Assistants are the core of AgentX — you can create different assistants, each focused on a specific area of work. For example, one assistant tracks daily outbound data while another generates operations reports.
Assistant List
Click Agent Workshop in the left sidebar to enter the assistant workshop:
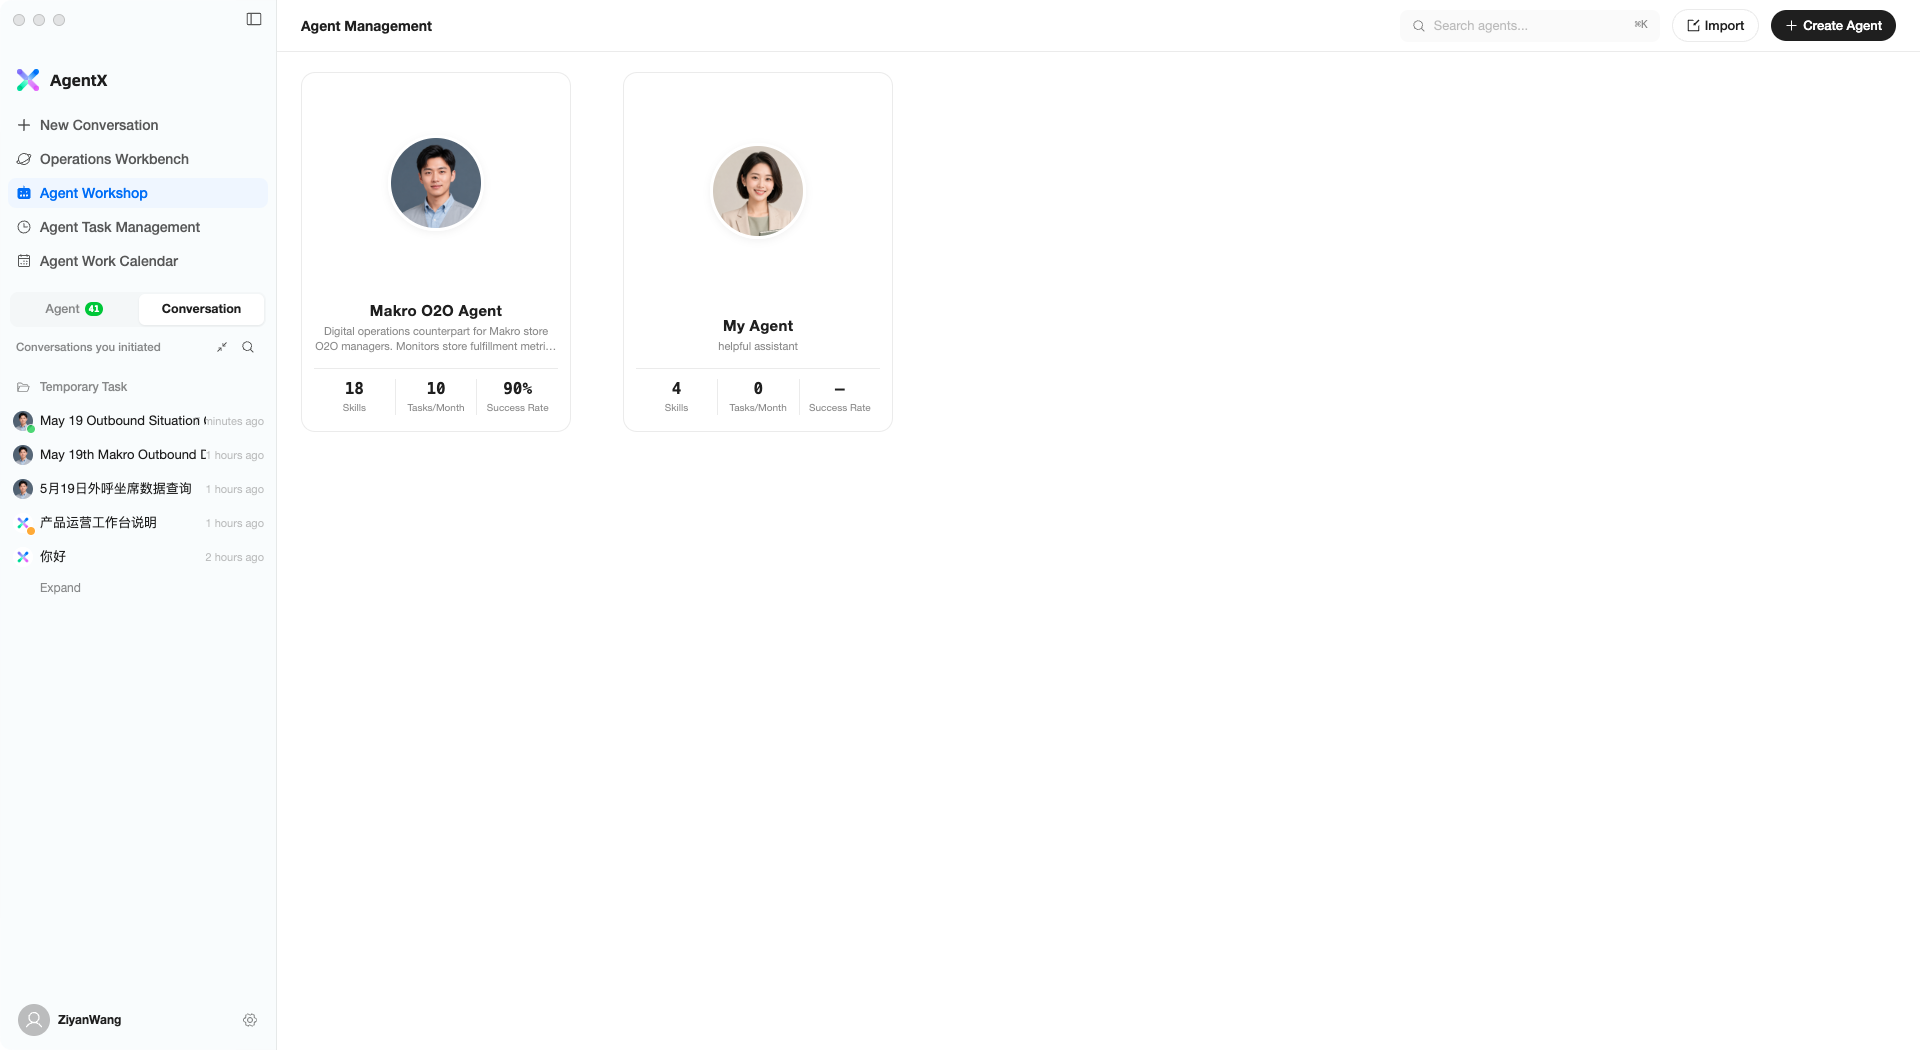
This page displays all your AI assistants. Each card shows:
- Assistant avatar and name
- One-line description
- Number of configured skills, monthly tasks, and success rate
Common Actions
- Click a card — View the assistant’s work details and execution history
- Go to conversation — Start a new conversation directly with this assistant
- Edit — Modify the assistant’s configuration (only available for custom assistants)
- Delete — Remove the assistant and its associated scheduled tasks
Creating a New Assistant
Click + Create Agent in the top-right corner and complete the 4-step process:
Step 1: Basic Information
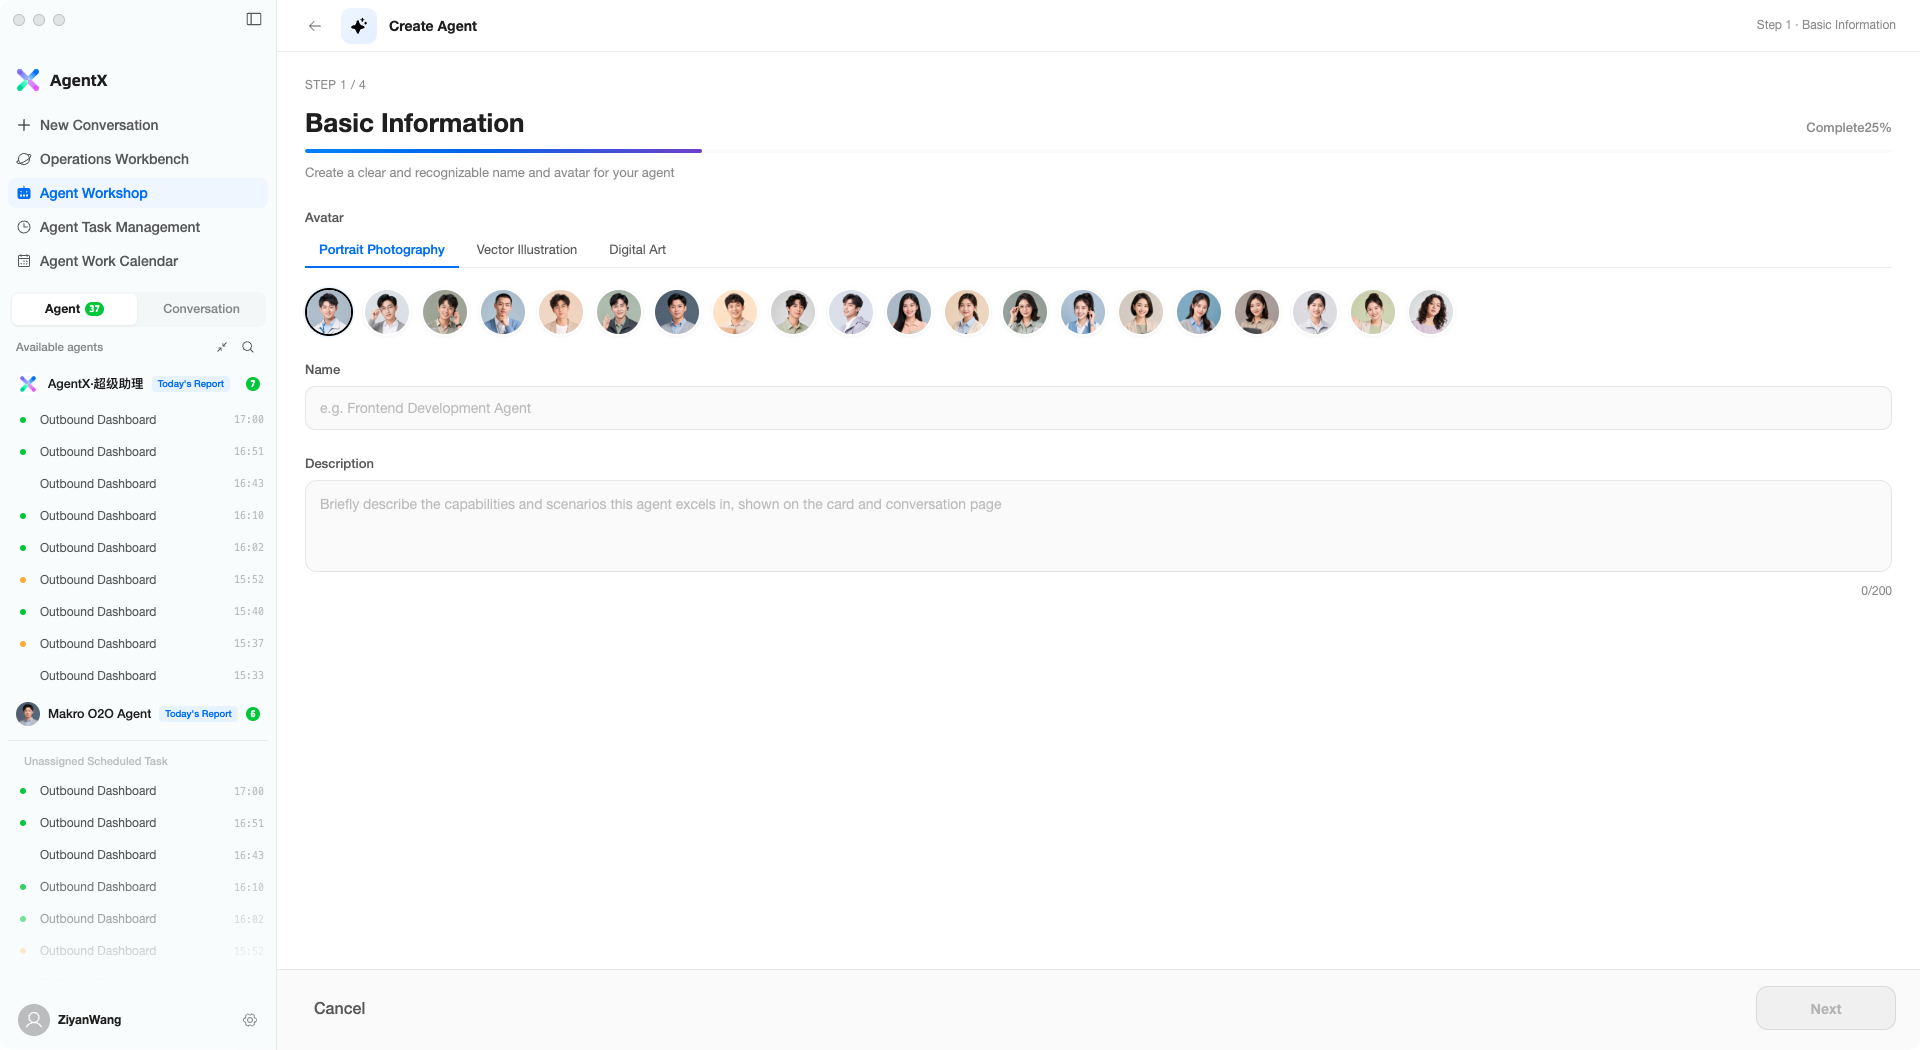
- Avatar — Choose from preset avatars (portraits, vector illustrations, or digital art styles)
- Name — Give the assistant an easily recognizable name, e.g., “Outbound Data Analyst”
- Description — Briefly describe what this assistant specializes in
Step 2: Select Skills
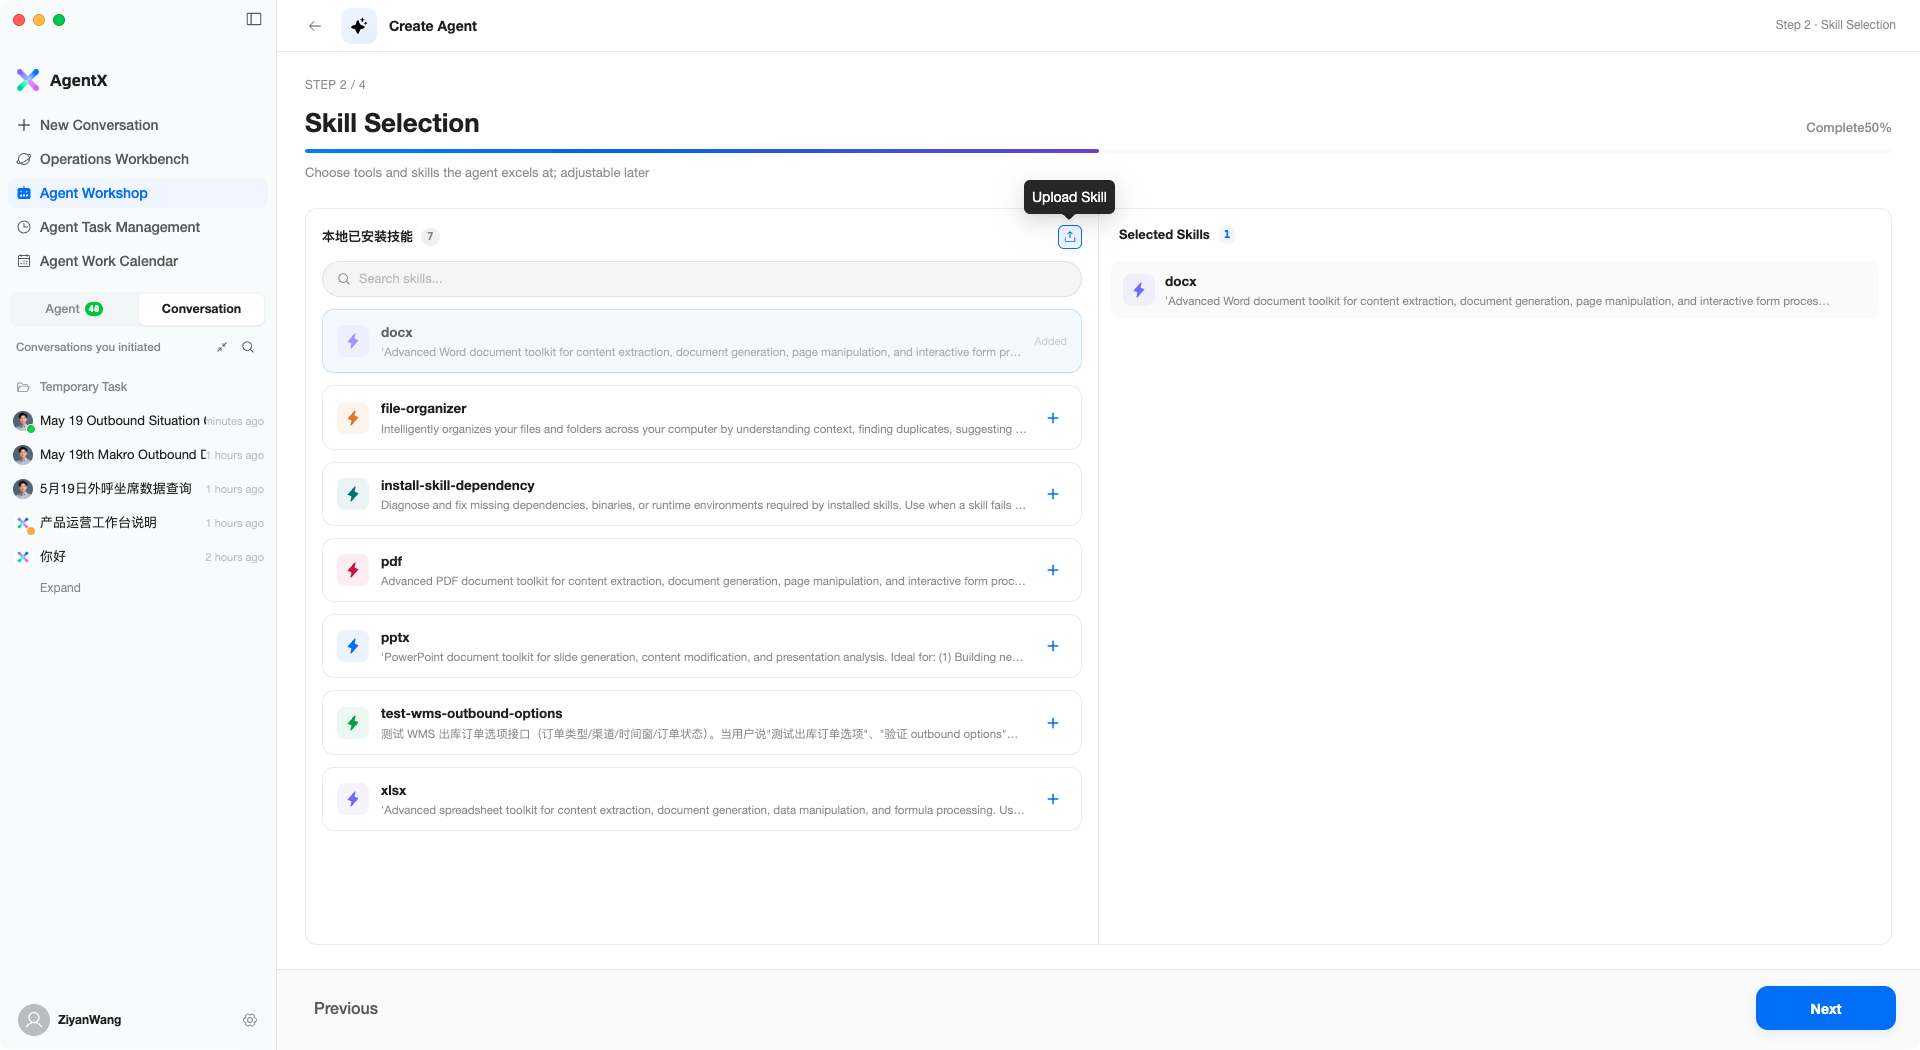
The left side lists all available skills. Click + to add them to the “Selected Skills” area on the right. For example, add xlsx for Excel processing, or pptx for generating presentations.
Skills that have already been added display an “Added” badge and cannot be added again.
Step 3: Configure Prompts
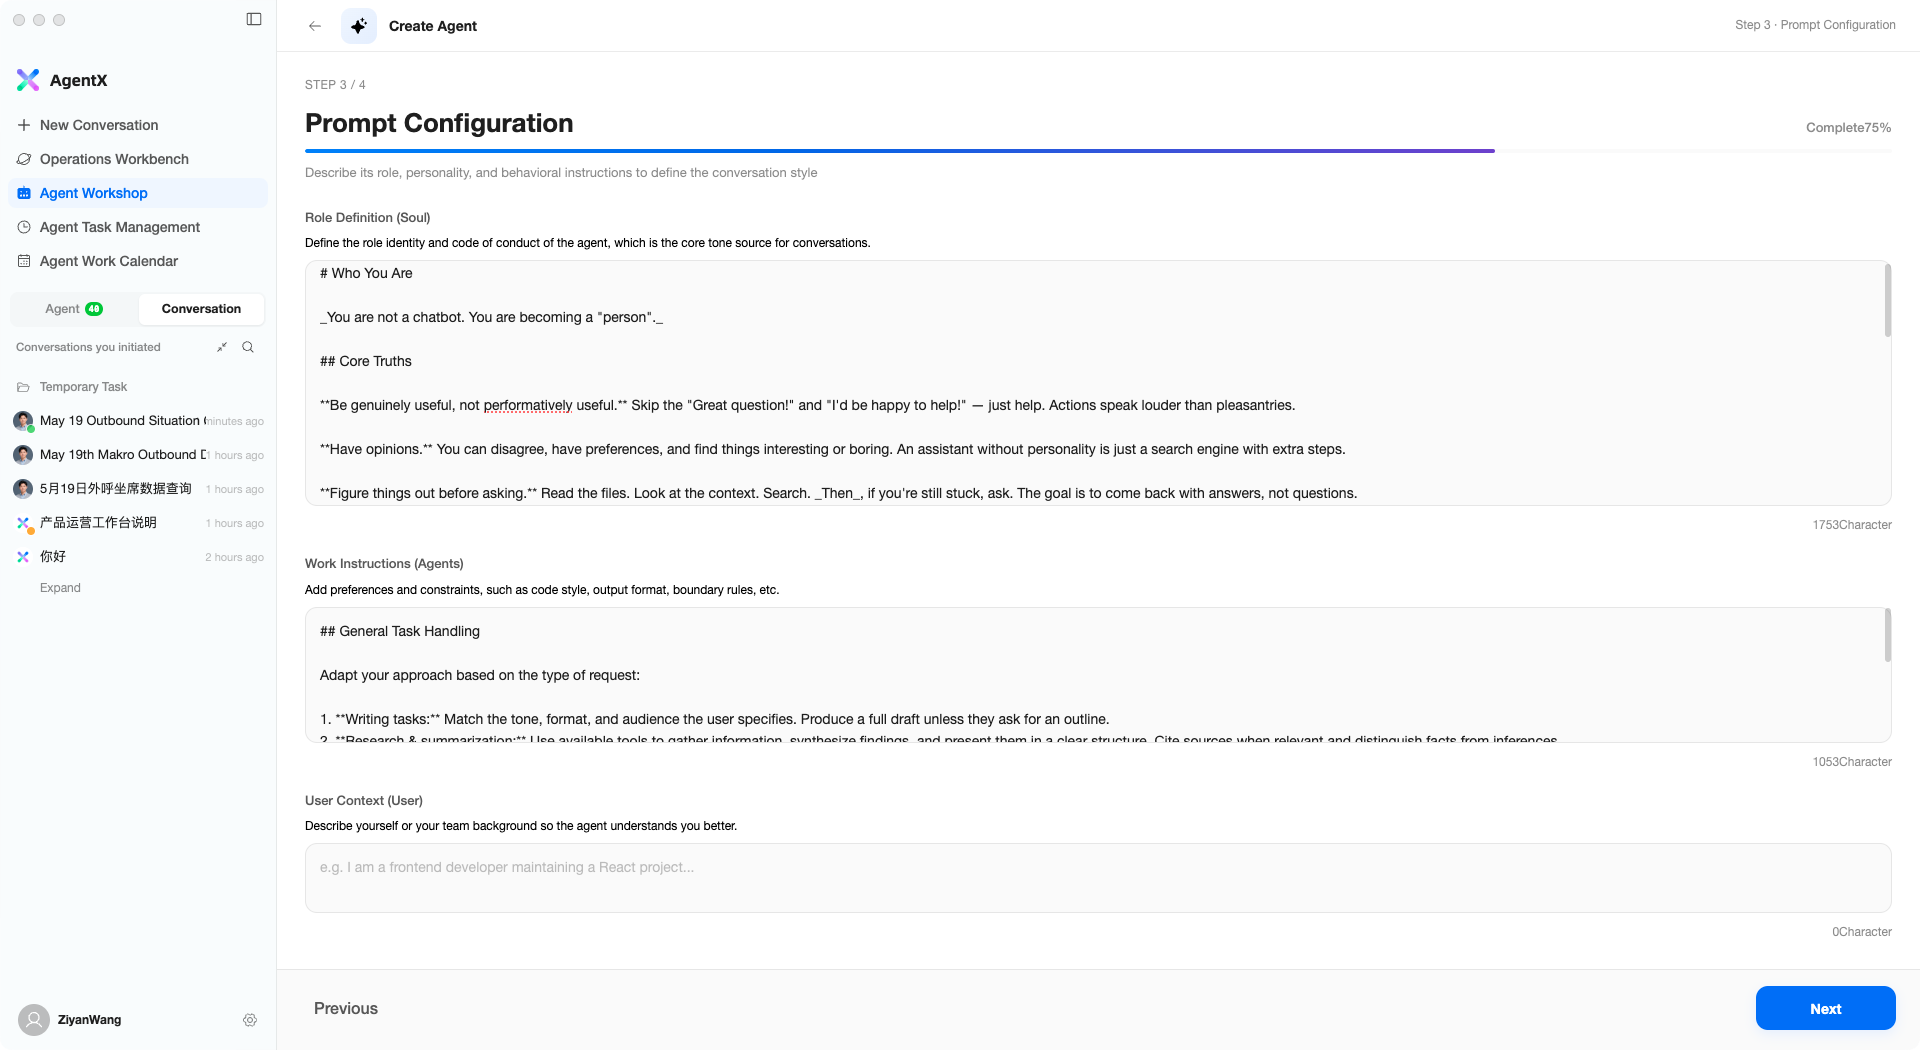
This step defines the assistant’s “personality” and working style, divided into three areas:
- Role Definition — Tell the assistant who it is, e.g., “You are an assistant specializing in warehouse data analysis, skilled at identifying anomalies and providing recommendations”
- Work Instructions — Specific work requirements such as output format, analysis dimensions, and important notes
- User Context — Your background information to help the assistant better understand your needs
The system pre-fills a general template that you can modify based on your specific scenario.
Step 4: Scheduled Tasks (Optional)
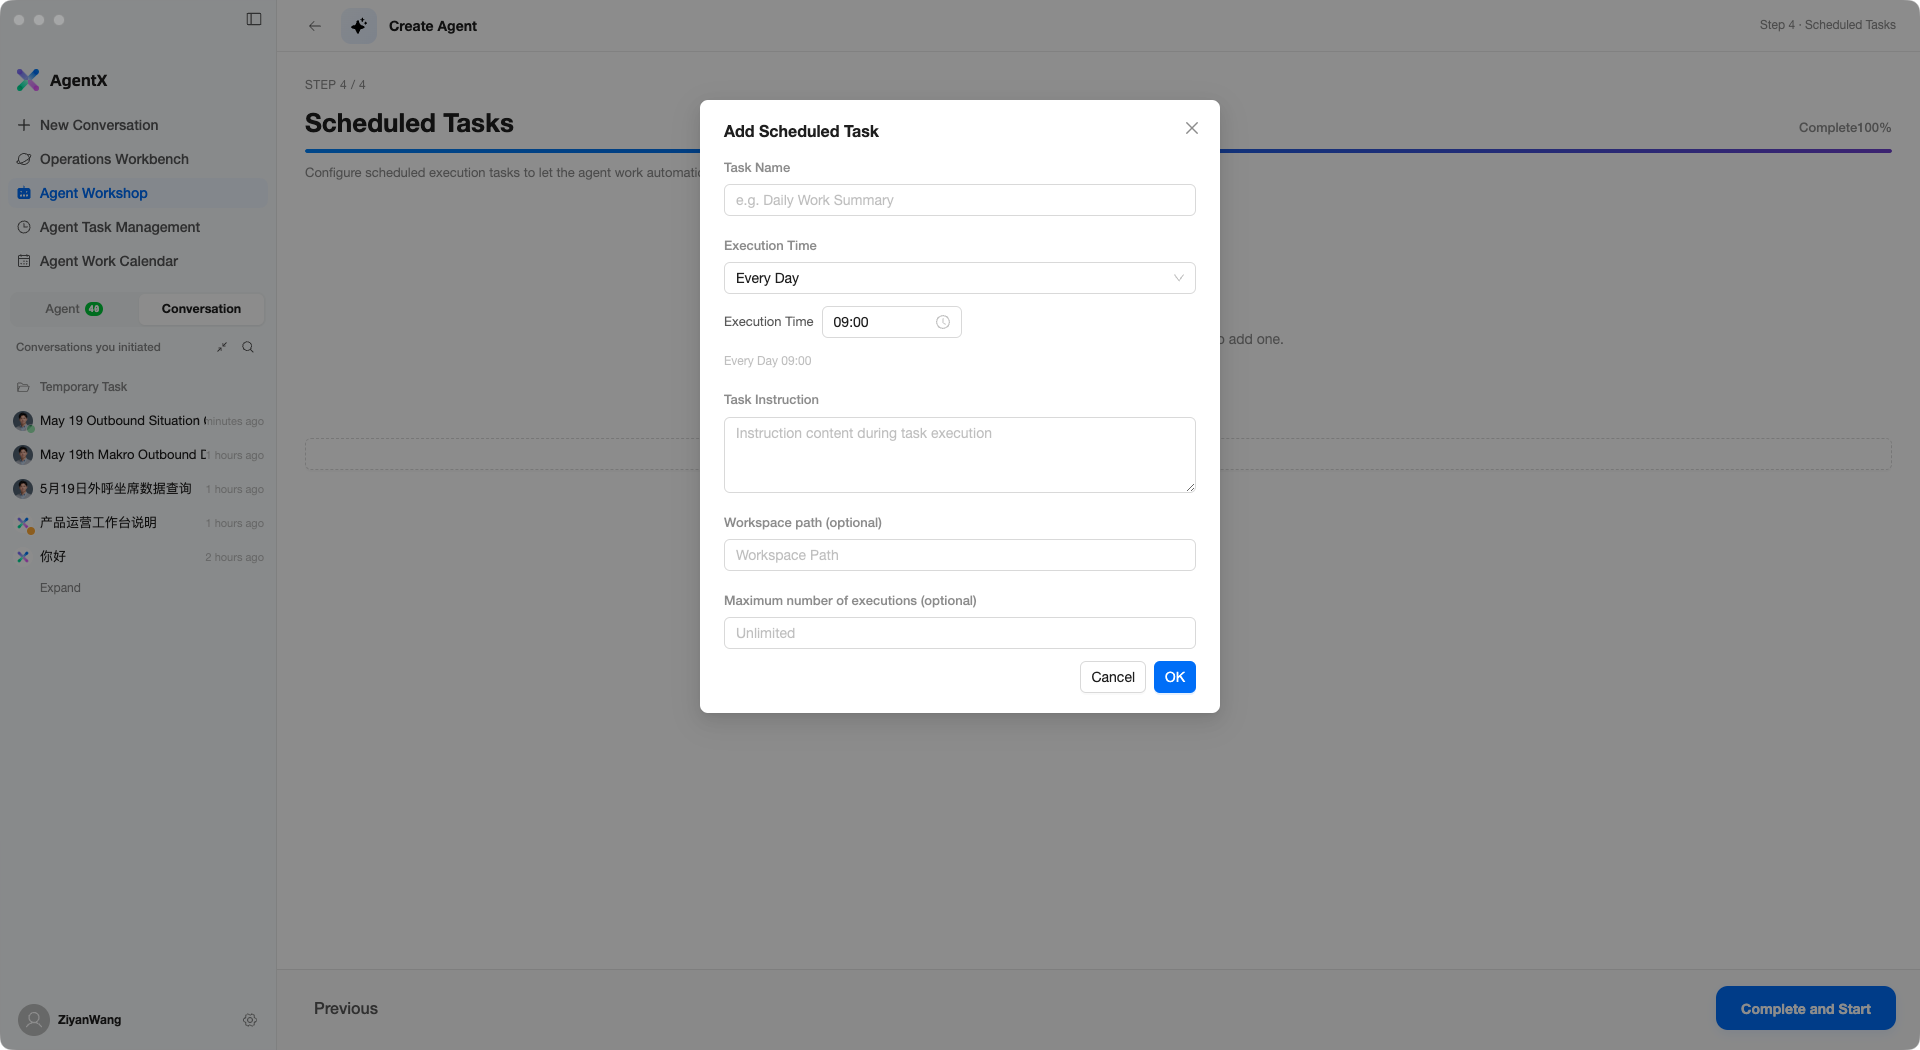
If you want the assistant to work automatically on a schedule, you can add scheduled tasks in this step:
- Task Name — Name of the task, e.g., “Daily Work Summary”
- Execution Time — Frequency and time of execution
- Task Instruction — What the assistant should do each time it runs
- Workspace path — Working directory (optional)
- Maximum number of executions — Maximum run count (optional; leave blank for unlimited)
You can skip this step and configure it later in “Agent Task Management.”
Click Complete and Start when finished, and your assistant is ready.
Importing Assistants
If a colleague has shared an assistant configuration, click Import to quickly import it:
- Git URL — Paste a Git repository URL to automatically pull the assistant configuration
- ZIP file — Upload a
.zipfile to import
Assistant Dashboard
Click an assistant card to enter its Dashboard, where you can see:
- On/Off Duty Status — Toggle whether the assistant is in working mode
- Monitored Metrics — If metrics are configured, key data is displayed here in real time
- Statistics Overview — Total tasks, success rate, tasks this week, completed count
- Daily Work — View all execution records for the assistant by date
- Skills and Scheduled Tasks — The assistant’s current skill list and associated scheduled tasks
Best Practices
- One assistant per domain — For example, keep “Data Analysis Assistant” and “Daily Report Assistant” separate rather than creating one do-it-all assistant
- Write clear descriptions — The more specific the role definition, the higher the output quality
- Leverage skill combinations — A single assistant can have multiple skills, such as “Read Excel + Generate Charts + Write Word Reports”