Conversation & Collaboration
Start conversations, input tips, and view AI work progress
Conversation is the primary way you use AgentX — describe your needs to the AI, and it handles the work for you.
Starting a New Conversation
After opening AgentX, click + New Conversation in the left sidebar or press Cmd + N to enter the new conversation page:
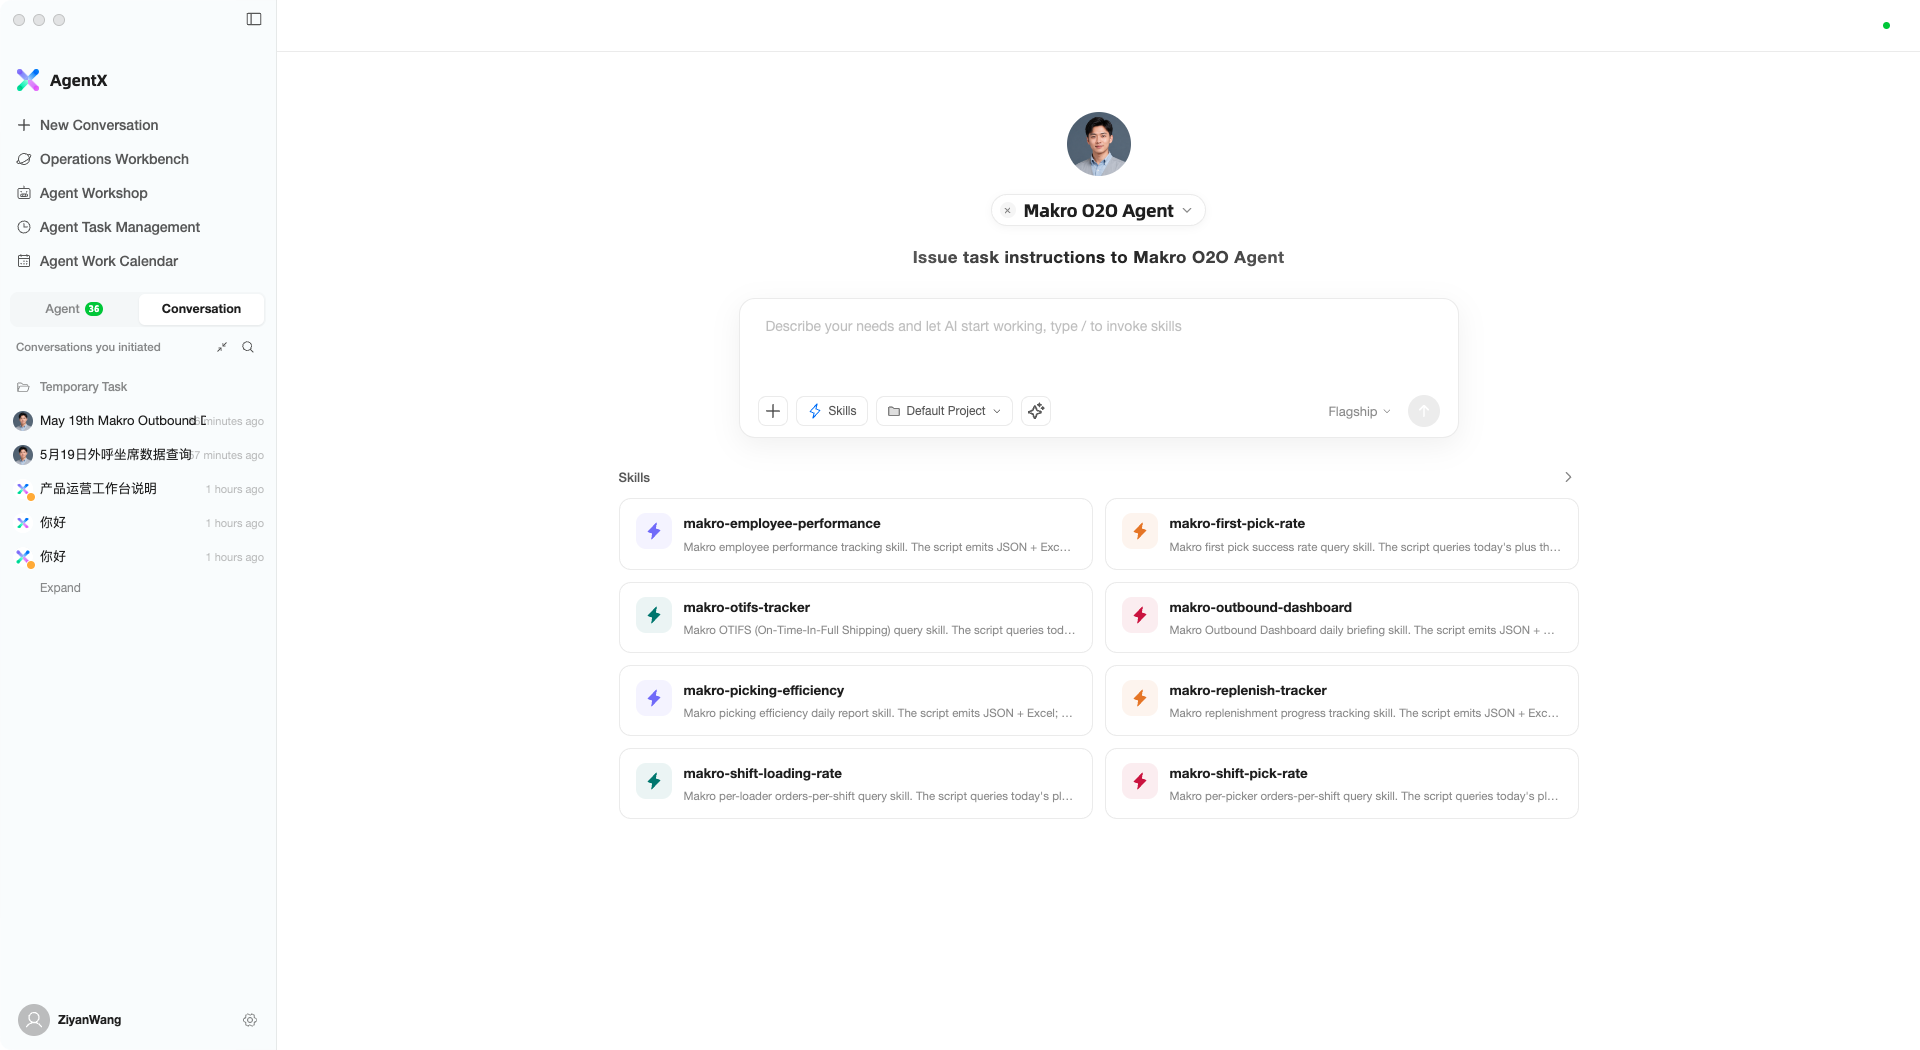
Page Layout
- Top — The current assistant (click to switch to a different assistant)
- Center — Input box where you describe what you want the AI to do
- Bottom — Recommended skill cards; click to quickly use the corresponding capability
Starting a Conversation
- Type your request in the input box, e.g., “Help me organize today’s outbound data and generate a report”
- Press
Enterto send - The AI begins working and the page automatically navigates to the conversation detail view
During a Conversation
After sending a message, you enter the conversation detail page:
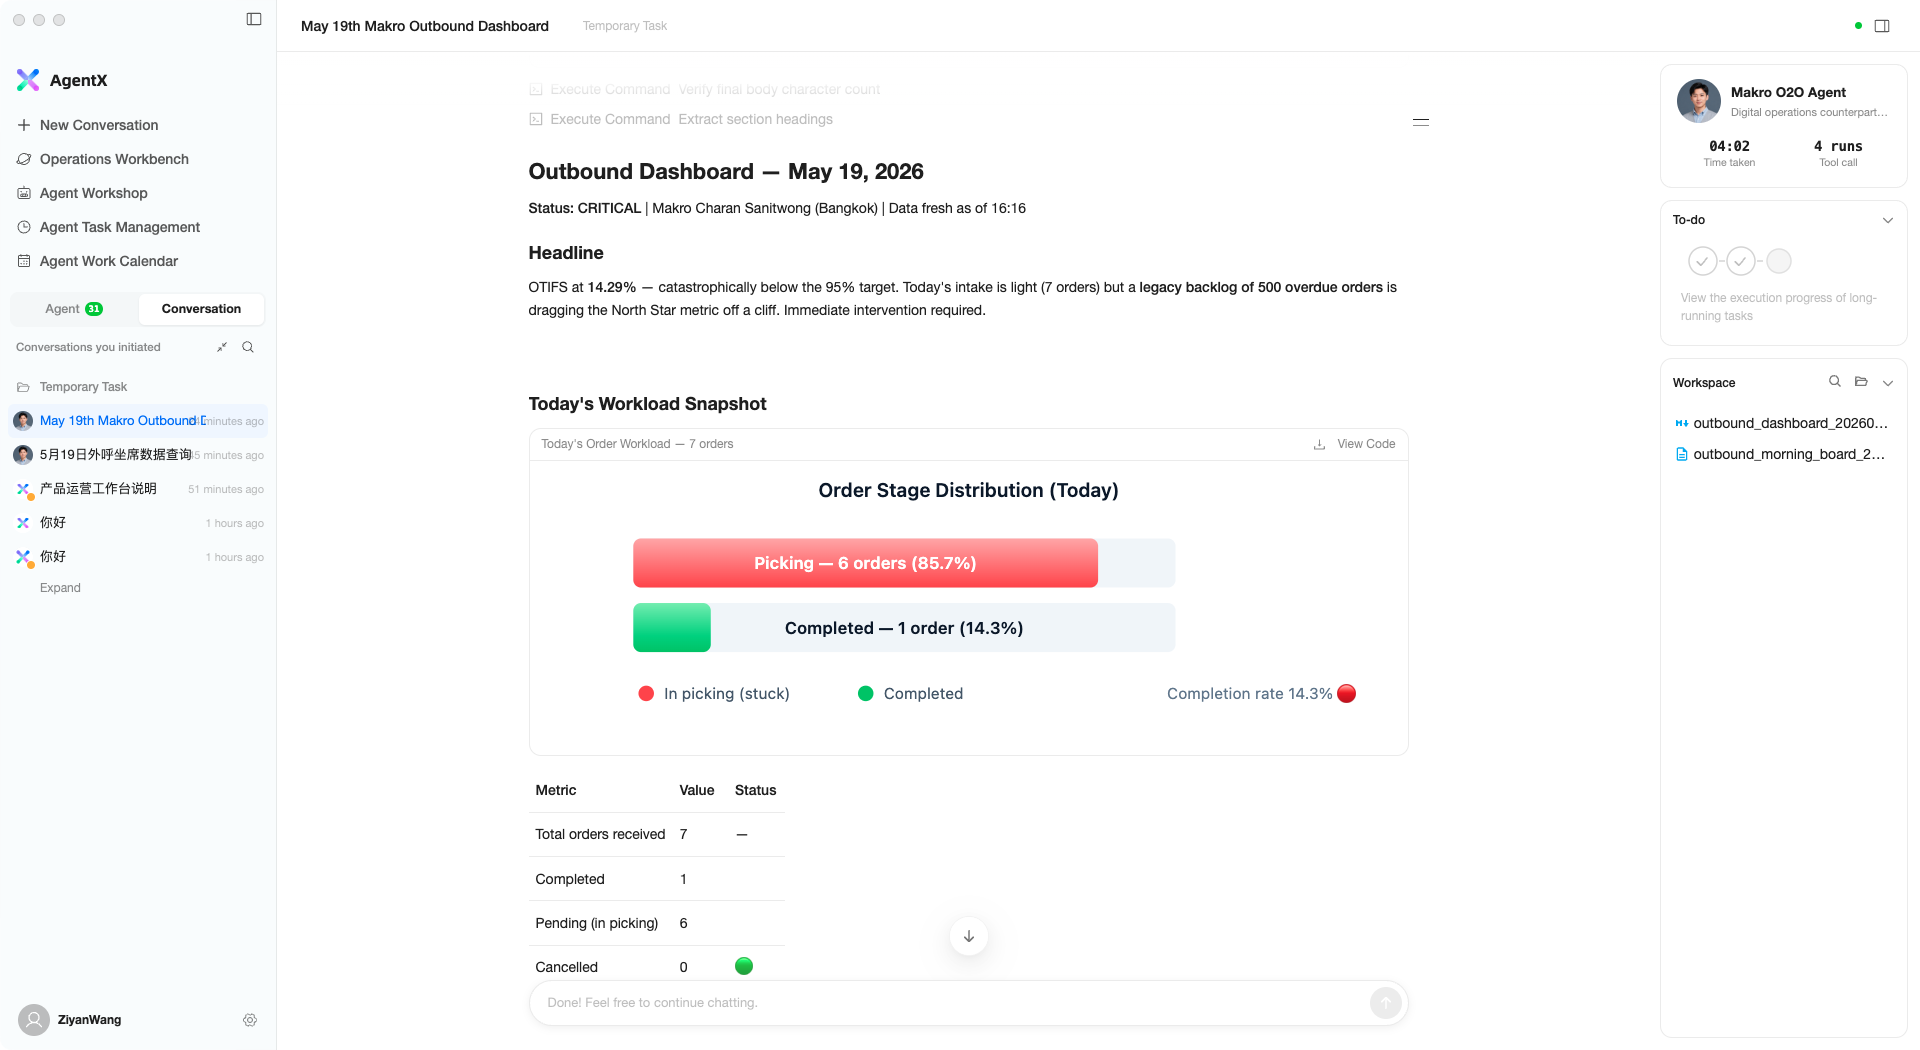
Left Side: Message Flow
This is where your conversation with the AI appears. While the AI executes tasks, you can watch its work process in real time — what tools it called, what data it analyzed, and what results it produced.
- Long messages are automatically collapsed; click to expand and view full content
- After the AI finishes, it suggests follow-up questions you might want to ask; click to continue
- Select text in the AI’s reply to copy or quote it in the next message
Right Side: Work Panel
- Assistant Info — Current assistant name, time worked, and number of tool calls
- Task Progress — If the AI is executing a multi-step task, progress is shown here
- Workspace Files — Files produced by the AI appear here; click to preview
Input Box Tips
The input box does more than just send text messages — it has many useful features:
Adding Files
Click the + button at the bottom-left of the input box to select files or folders to send to the AI for analysis:
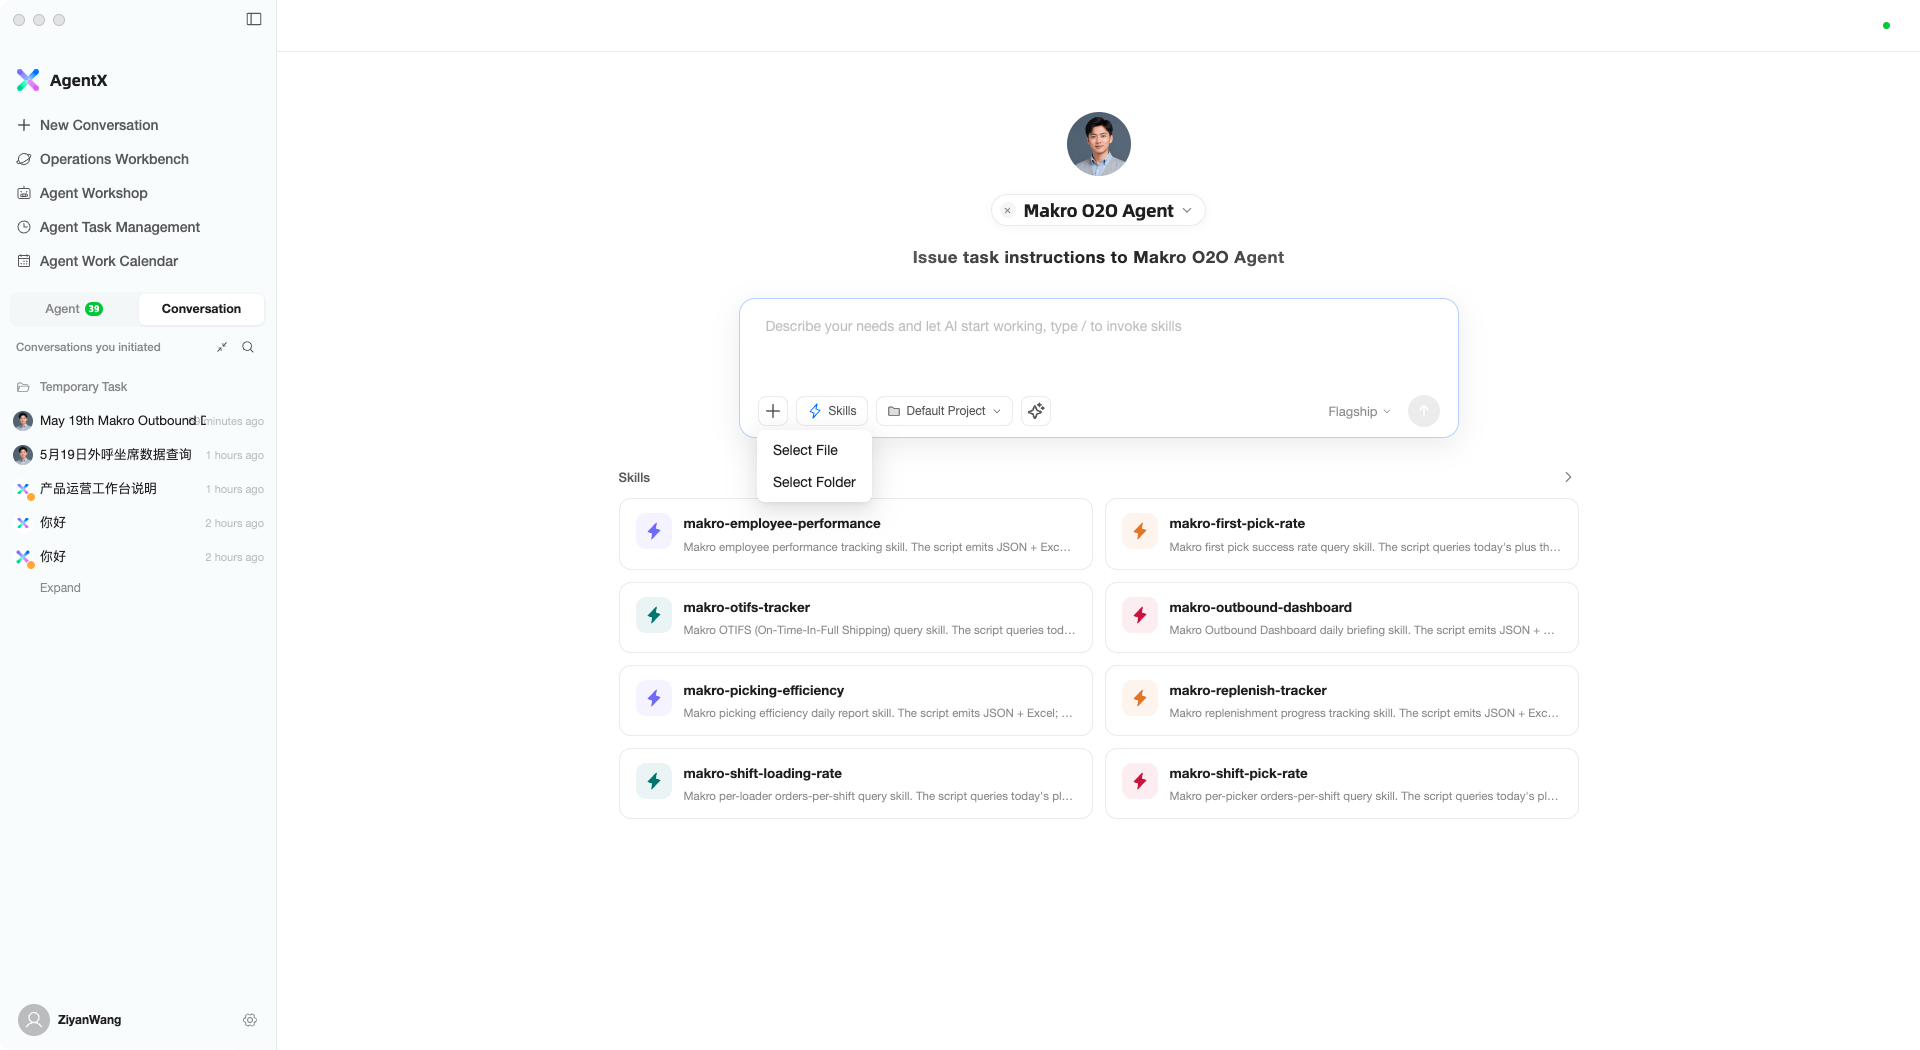
- Select File — Choose one or more files
- Select Folder — Choose an entire folder
You can also drag and drop files directly into the input box, or paste images with Cmd + V.
Using Skills
Type / to open the skills panel, which lists all available skills and tools:
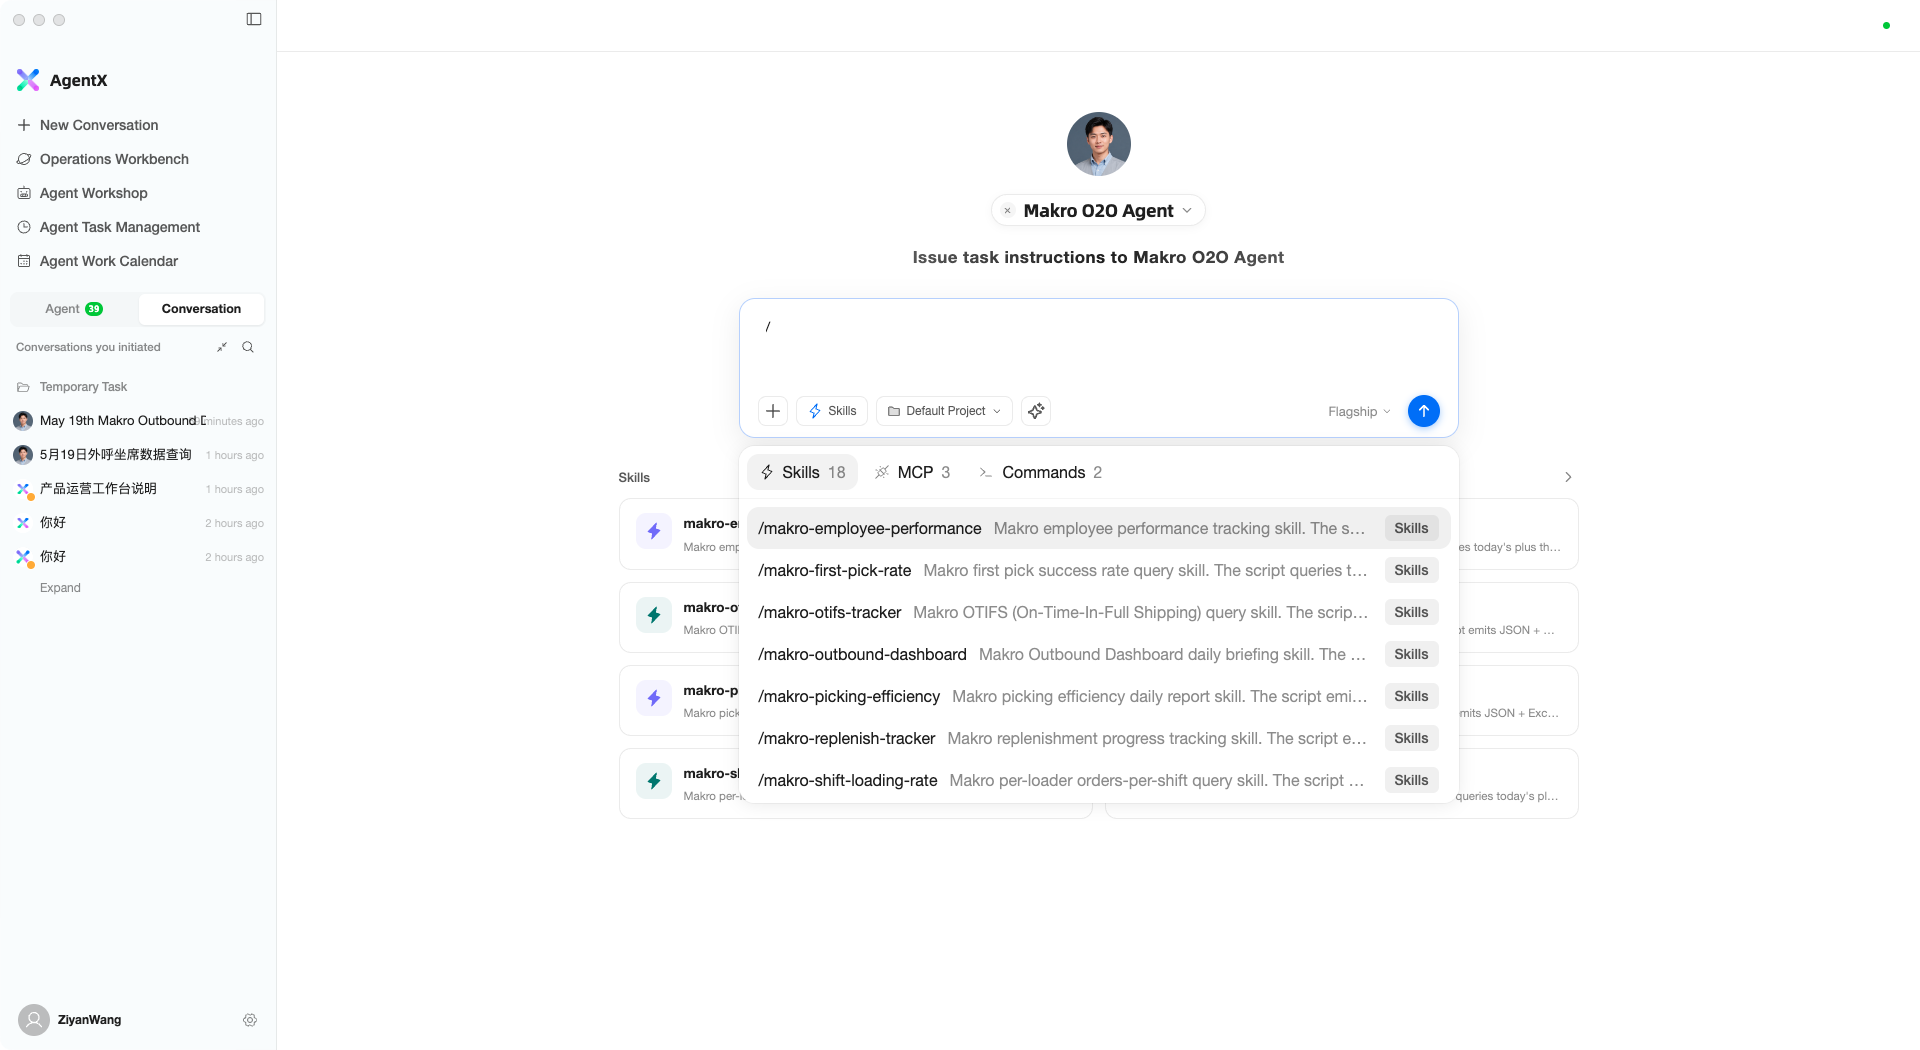
The panel has three tabs:
- Skills — All available skills
- MCP — Connected external tools
- Commands — System commands (e.g., compress context, clear conversation)
After selecting a skill, it is inserted into the input box, and the AI can use that capability to complete your task.
Switching Models
Click the model name at the bottom-right of the input box to select a different AI model:
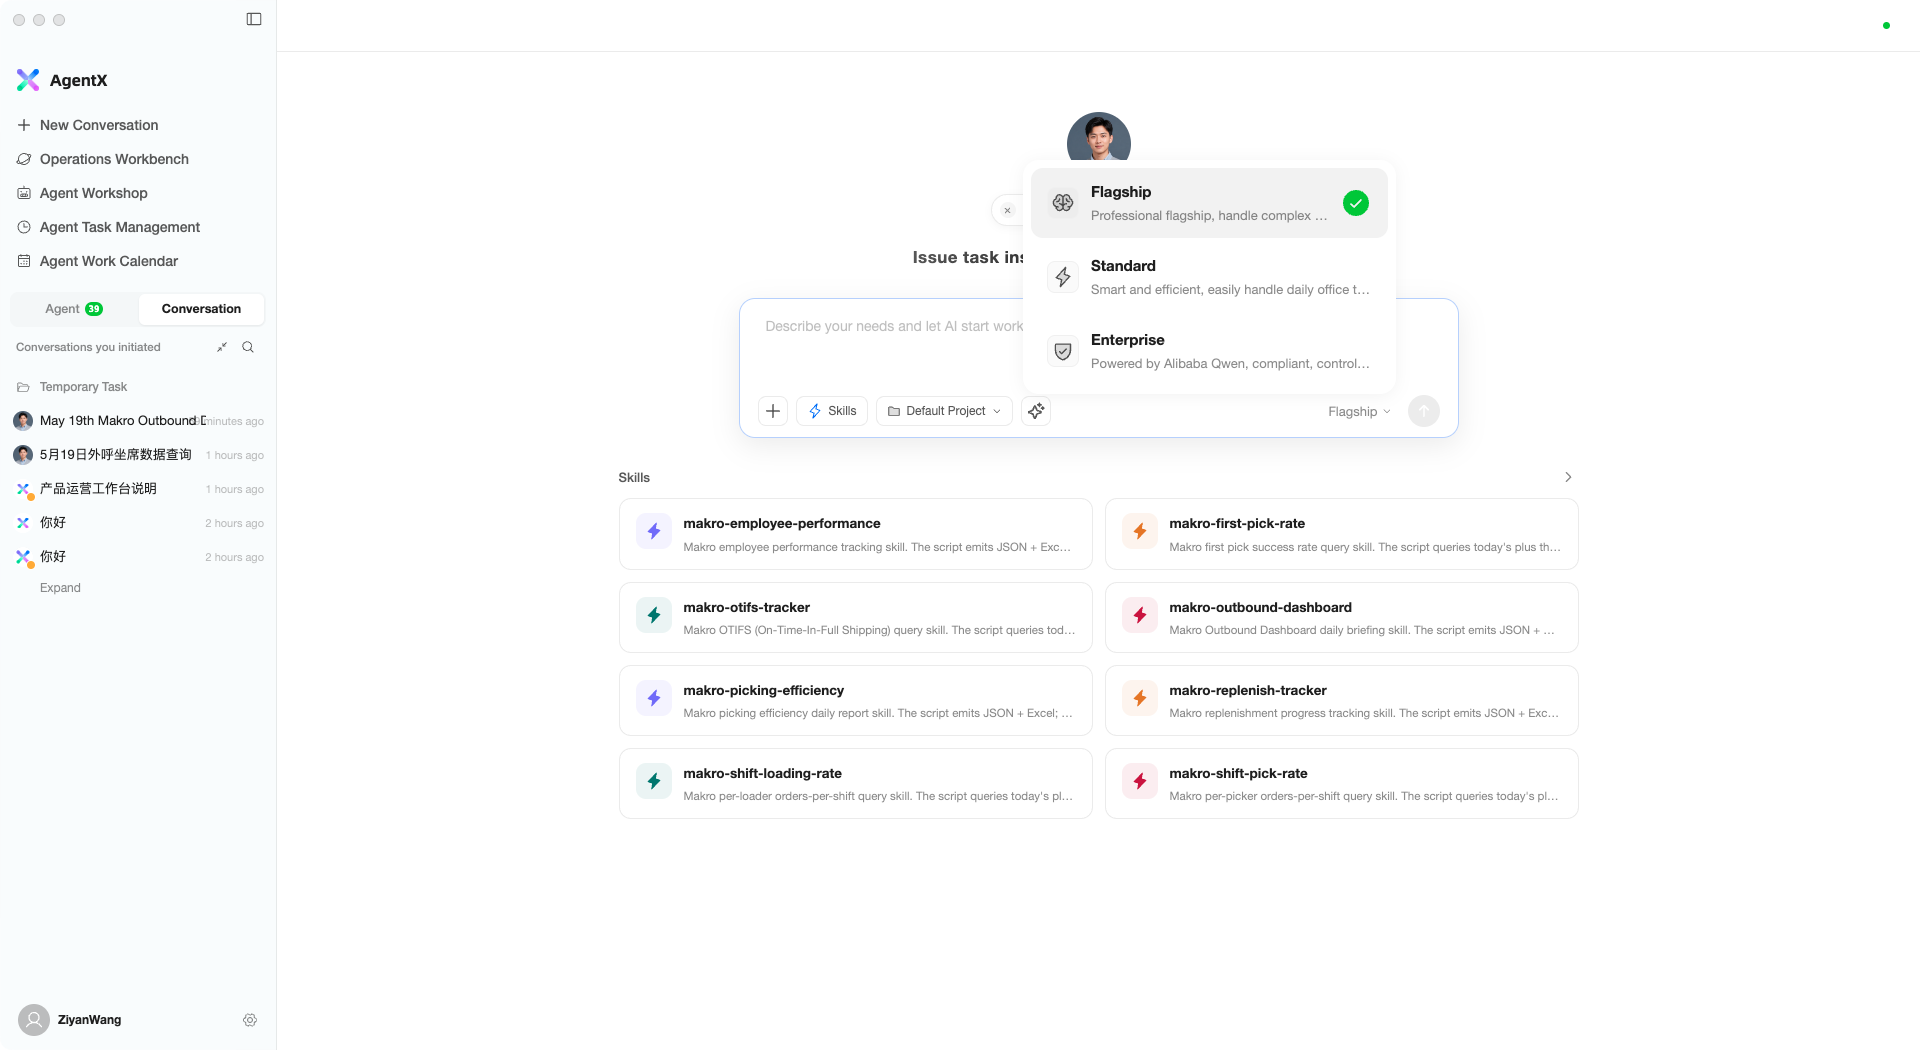
| Model | Characteristics |
|---|---|
| Flagship | Top-tier model (Claude 4.6), strongest at handling complex tasks |
| Standard | Standard model, fast and efficient for daily office tasks |
| Enterprise | Enterprise model (Alibaba Qwen), compliant and controllable |
In most cases, Flagship is sufficient. Switch to Standard for simple tasks to improve speed.
Optimizing Prompts
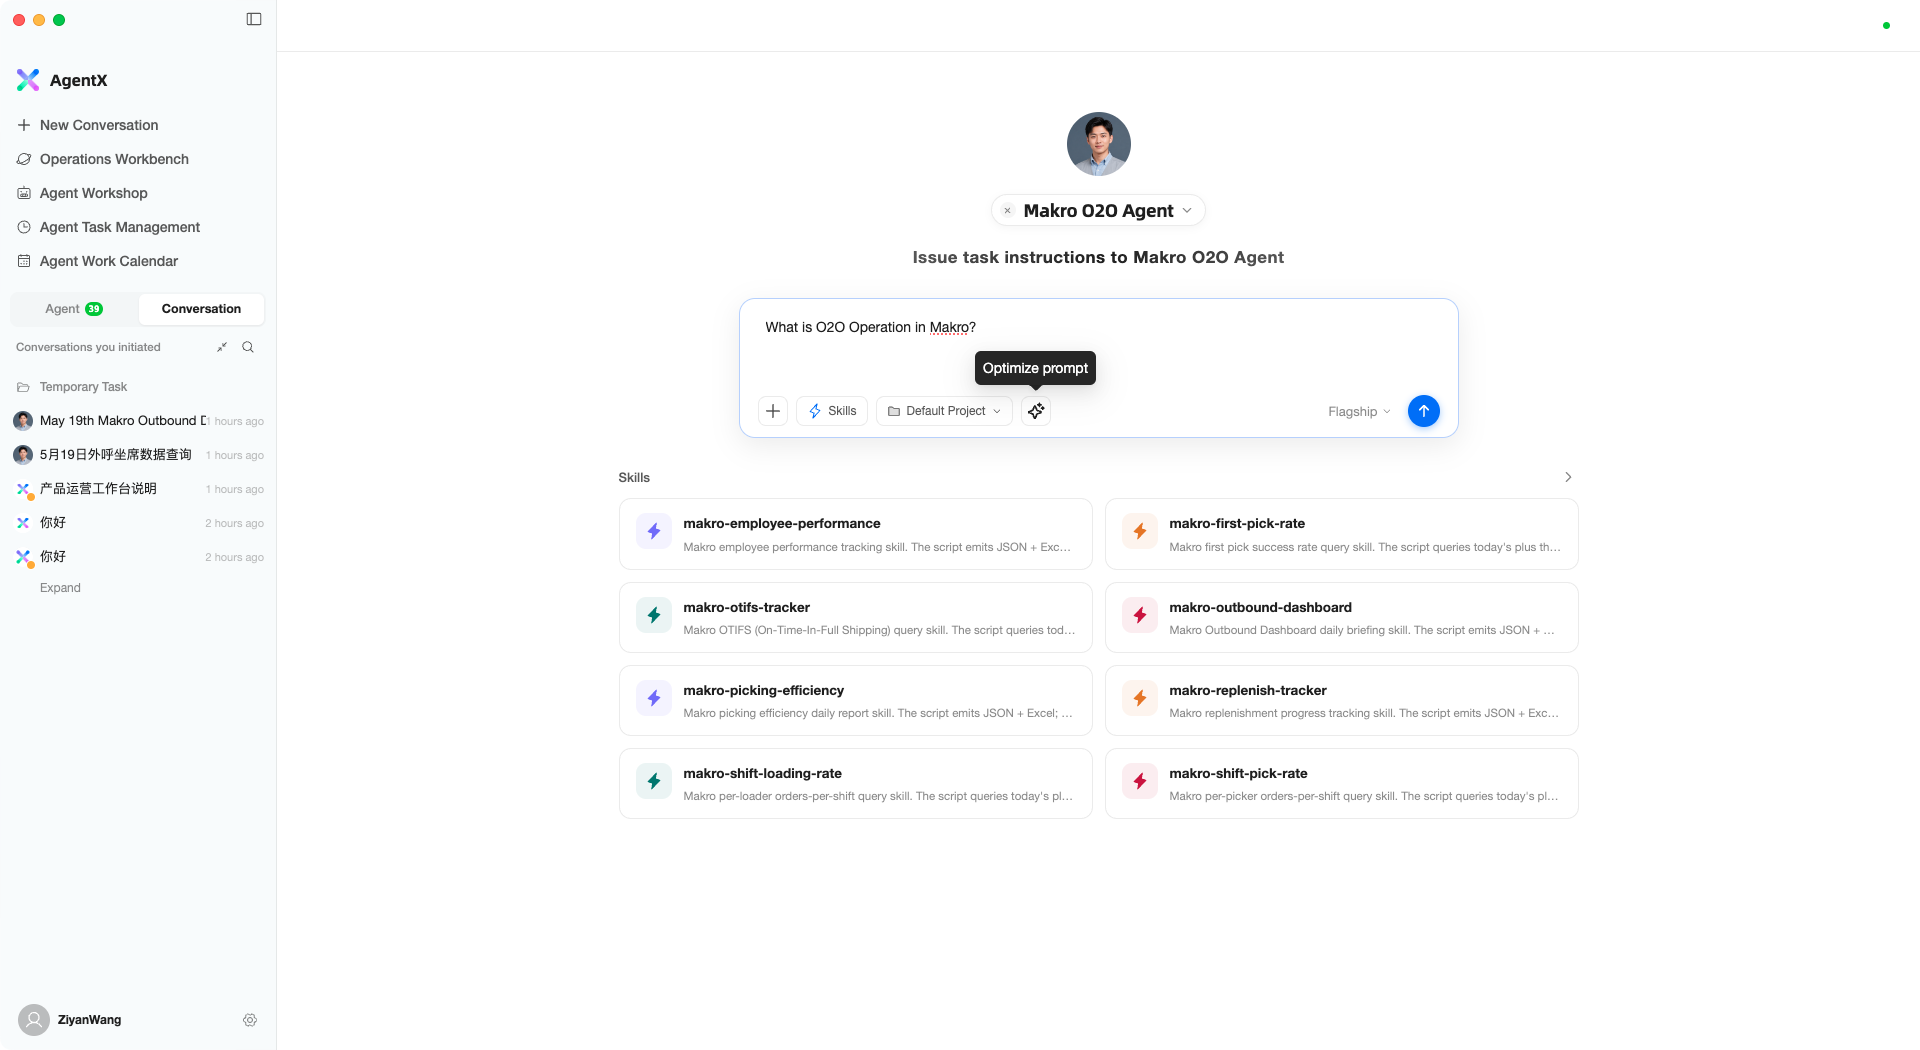
If you are unsure how to express your request clearly, use the “Optimize prompt” feature. After typing your idea, click the Optimize prompt button:
Before optimization — Your rough draft:
After optimization — AI automatically rewrites it into a structured task description:
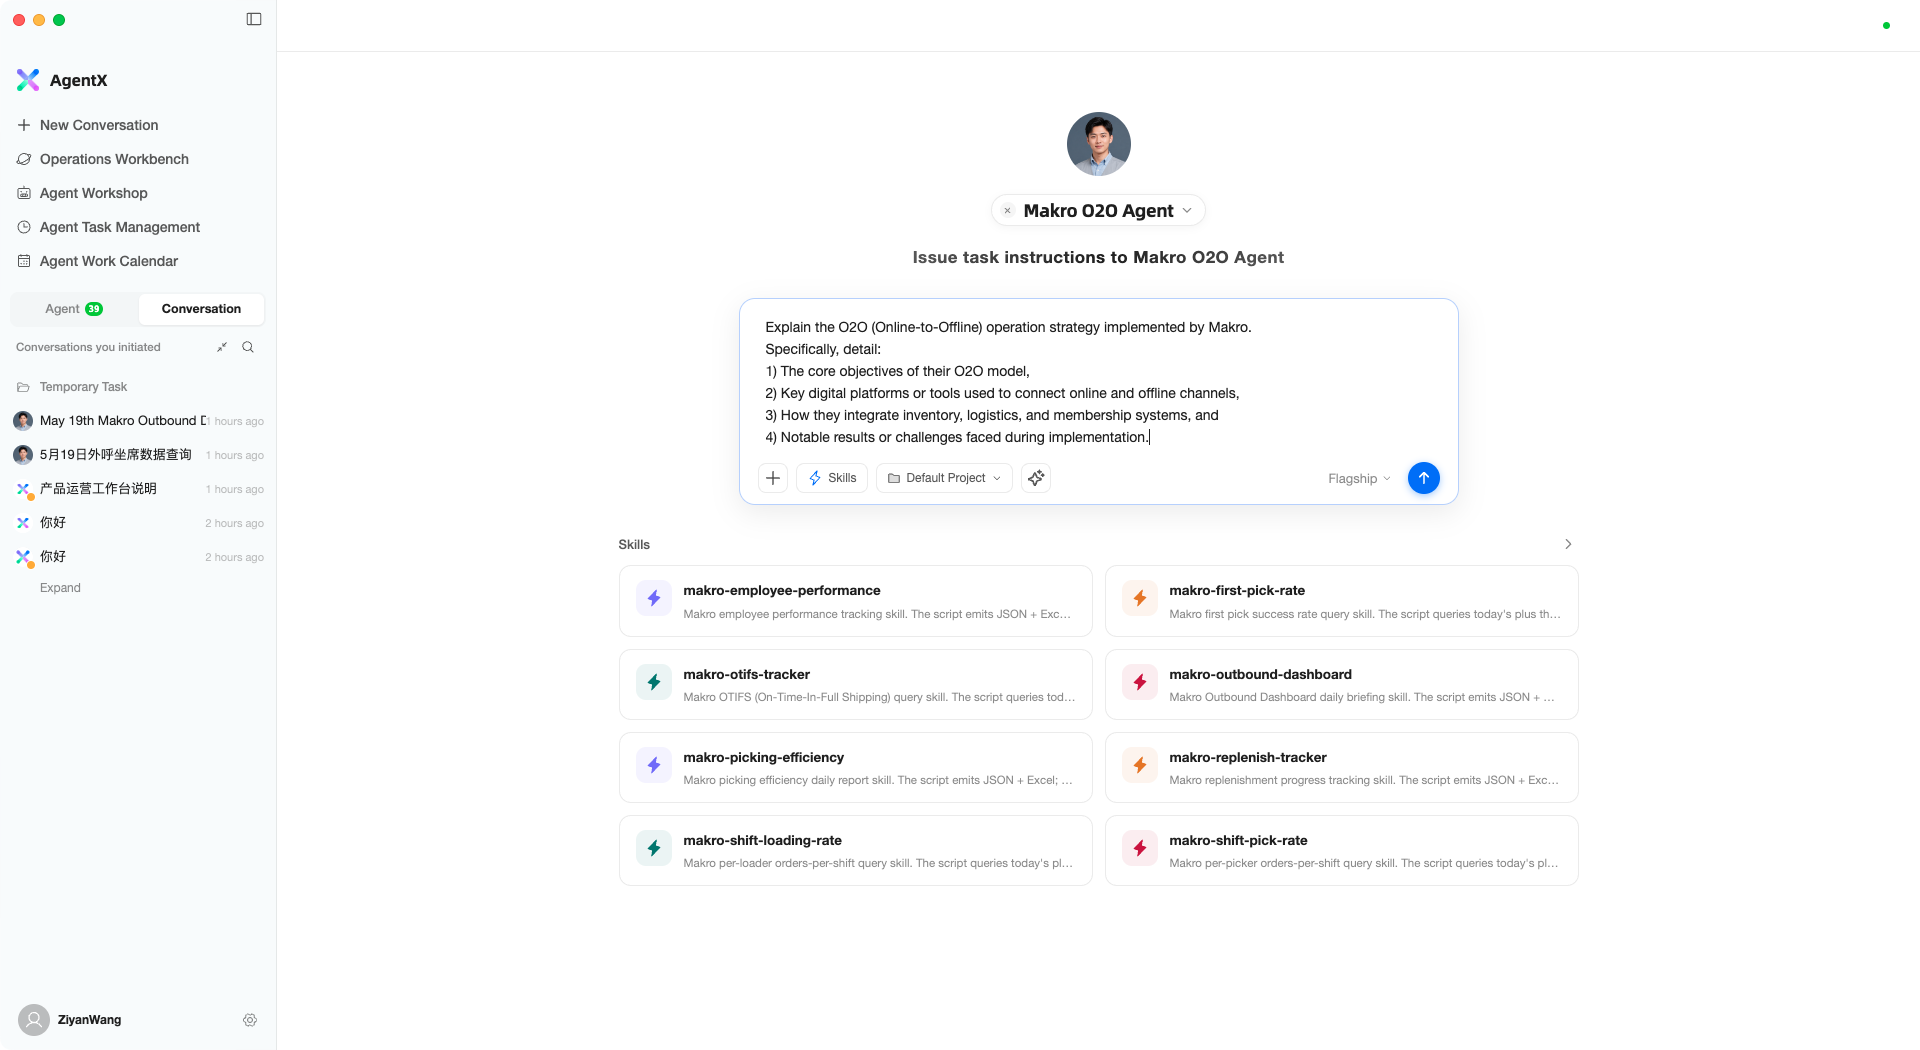
The optimized instruction is more specific and better organized, leading to significantly better AI performance.
Shortcuts
| Action | Method |
|---|---|
| Send message | Enter |
| New line (without sending) | Shift + Enter |
| Paste image | Cmd + V |
| Browse input history | Up / Down arrow keys |
Queuing Messages During AI Work
If the AI is currently working, you can continue typing new messages. After sending, messages enter a queue and are automatically processed once the current task completes:
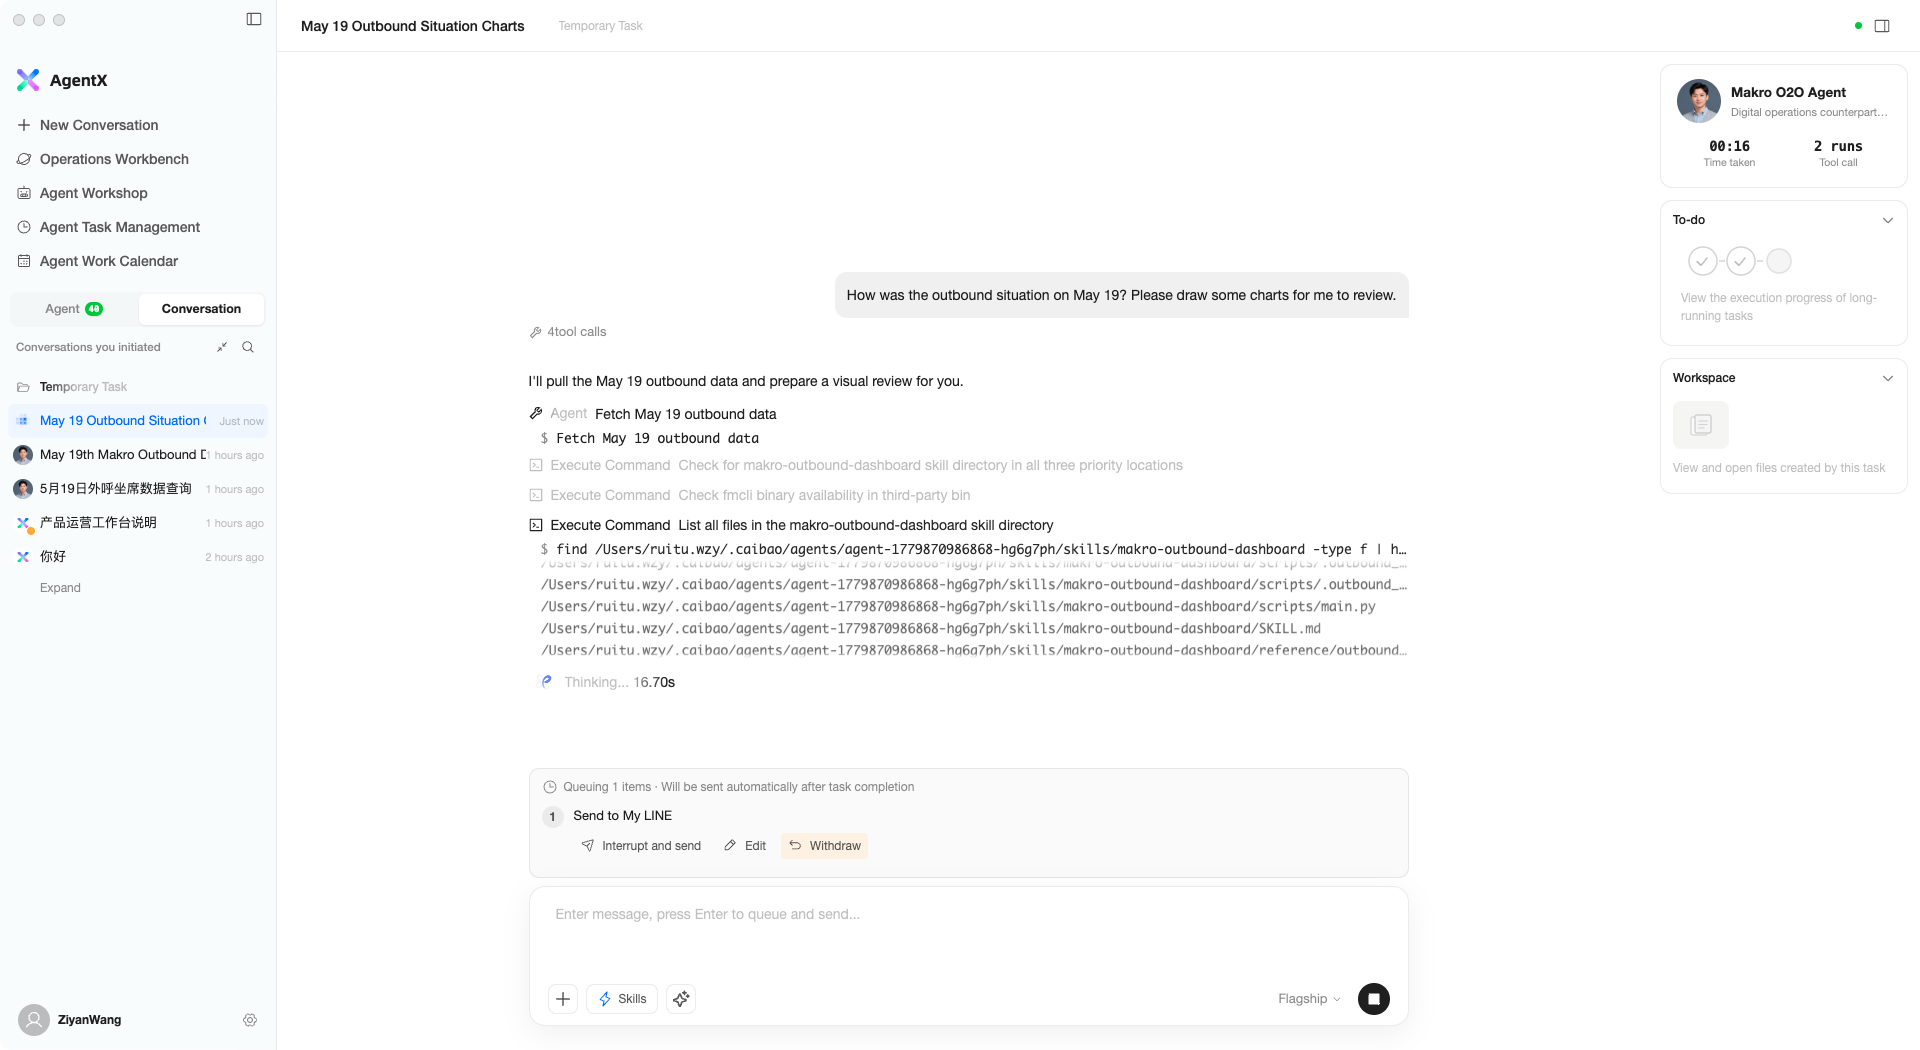
Queued messages support three actions:
- Interrupt and send — Stop the current task and immediately process your new instruction
- Edit — Pull the queued message back into the input box for re-editing
- Withdraw — Cancel this queued message
Switching Assistants
On the new conversation page, click the assistant name at the top to open the selection window:
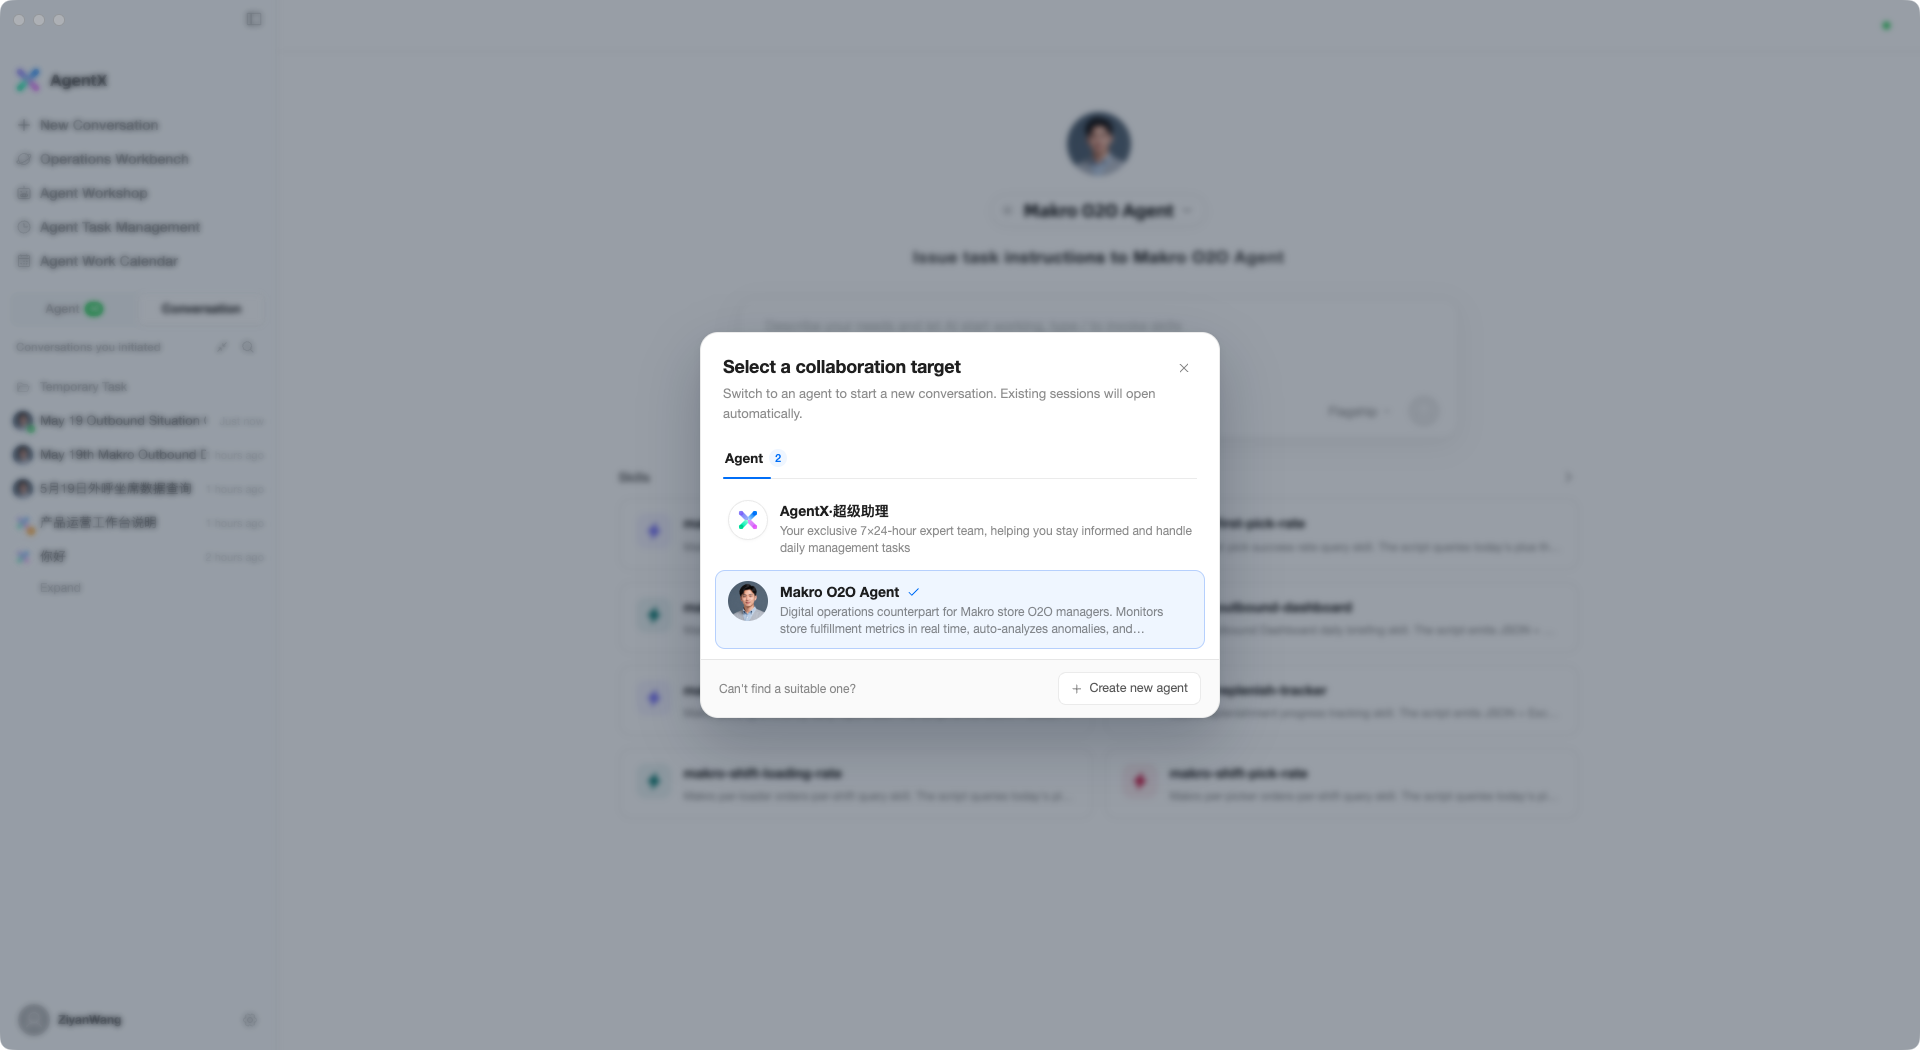
The list shows all available assistants and their descriptions; click to switch. Each assistant has different specializations and skill configurations — choosing the right assistant for your current task yields better results.
If no suitable assistant exists, click + Create new agent at the bottom to create one.
Tips for Better Results
- Be as specific as possible when describing tasks. For example, “Analyze May outbound data and calculate completion rate by channel” is much more effective than “Analyze data”
- You can give the AI multi-step instructions in a single message; it will execute them in order
- All conversation history is preserved in the left sidebar and can be reviewed at any time